So, you’ve just snagged the perfect domain name. Congratulations! That’s a huge first step. But what now? A domain by itself is like having a street address for an empty lot. To turn that address into a destination, you need to connect it to a web host, set up a professional email, and lock it down with an SSL certificate.
These aren't just technical chores; they're the foundational moves that transform your domain from a name into a functional, trustworthy online presence.
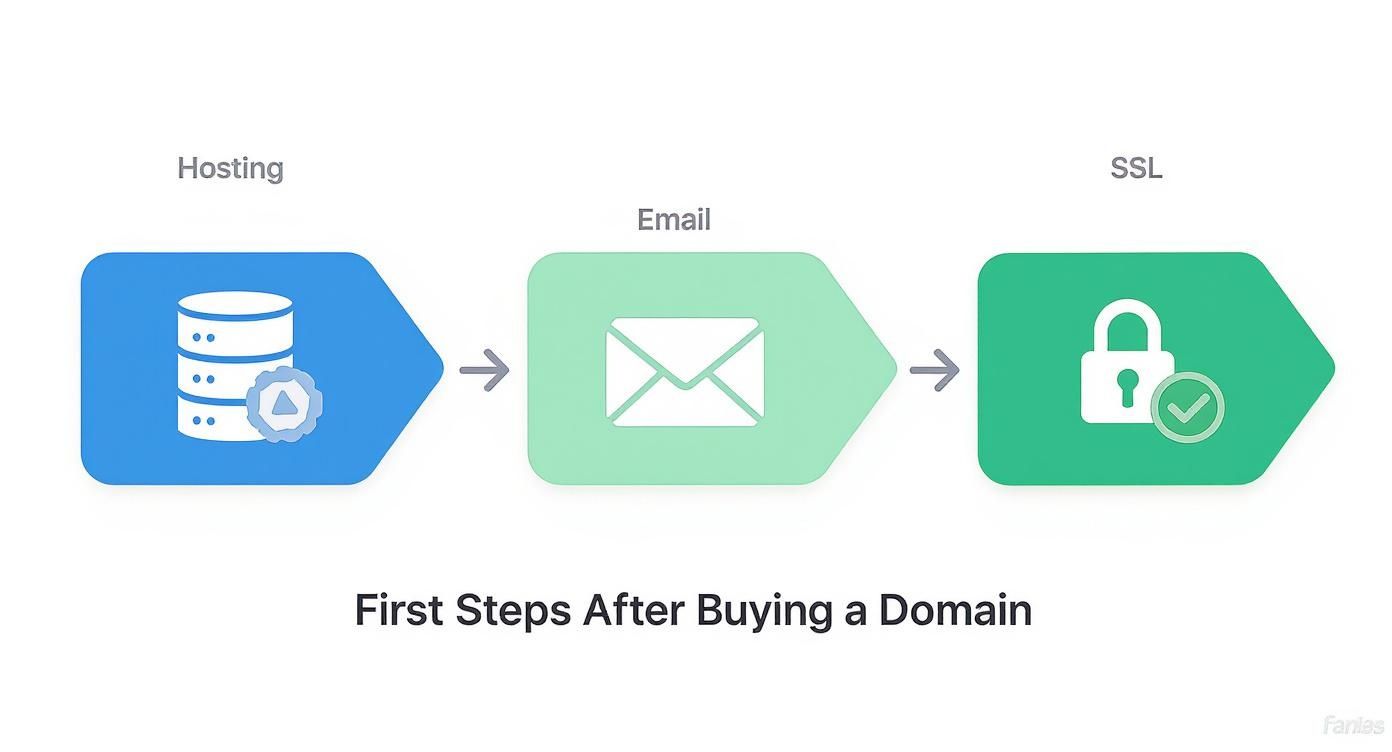
Your First Moves After Buying a Domain
Owning a domain is a great start, but to build your digital home, you need to hook it up to the essential services that bring it to life. Think of these initial tasks as laying the foundation before the walls go up. Your priorities are clear: find a reliable web host, create a branded email, and secure your site.
Before we dive into the details, here’s a quick-glance checklist of your immediate priorities.
Immediate Domain Setup Checklist
This table gives you a quick overview of the essential tasks to tackle right after your domain purchase.
| Action Item | Why It's a Priority | Typical Timeframe |
|---|---|---|
| Connect to Web Hosting | It’s the physical space where your website files will live. Without it, your domain is just an empty address. | 15-30 minutes to choose a plan and connect. |
| Set Up Professional Email | Establishes brand credibility and trust. you@yourdomain.com looks far better than a generic Gmail address. |
5-10 minutes to create your first mailbox. |
| Install an SSL Certificate | Secures your site, protects visitor data, and is a confirmed Google ranking factor. The padlock icon is non-negotiable. | 5-15 minutes (often included and automated by your host). |
Getting these three things done right away builds the momentum you need to get your project off the ground.
Select a Reliable Web Host
Your domain name is the address, but web hosting is the actual house where your website's files, images, and content are stored. This is one of the most critical decisions you'll make, as your hosting provider directly impacts your site's speed, uptime, and the overall experience for your visitors. Our guide on how to choose the right web hosting can walk you through the options.
Unfortunately, this is where a lot of new domain owners get stuck. It’s estimated that around 30% of newly registered domains stay inactive or parked, often because of confusion around setting up hosting. You can read more about these domain registration statistics from HostingAdvice.com.
The takeaway is simple: Don't let your domain gather digital dust. Acting quickly to select and connect a hosting plan is the single most important action you can take to move your project forward.
For example, when you start looking, you'll see providers package their services into different tiers to match different needs.
This screenshot from Namecheap shows a common setup: Shared hosting for beginners, managed WordPress hosting for those using the platform, and VPS hosting for sites that need more power.
Create Professional Email and Secure Your Site
Once your hosting is sorted, your next quick win is setting up a professional email address, like contact@yourdomain.com. This is a small step that makes a huge difference in how customers perceive your brand. It instantly adds a layer of trust and professionalism that a generic Gmail or Yahoo address just can't match.
Finally, installing an SSL certificate is non-negotiable in today's web. This certificate encrypts the data between your visitors' browsers and your server, keeping their information safe. It’s what puts the "s" in "https" and displays that little padlock icon in the browser bar—a universal symbol of security that builds visitor confidence and is a known Google ranking factor.
So, you’ve got a brand-new domain name. Awesome. Think of it as the unique street address for your future website. But an address is just a location—it needs a house built on it. That "house" is your web hosting account, the place where all your website's files will actually live.
Right now, your domain registrar (like GoDaddy or Namecheap) knows the address, and your hosting provider (like SiteGround or Kinsta) owns the property. Your first big job is to connect the two by telling the registrar where to send visitors. You do this by pointing your nameservers.
Finding and Updating Your Nameservers
Don’t let the term "nameservers" intimidate you. They’re just pointers that direct traffic from your domain name over to your hosting server. Your web host will provide you with at least two of these, and they usually look something like this:
ns1.yourhost.comns2.yourhost.com
You'll almost always find these in the welcome email you got from your host right after signing up. If not, they’ll be sitting in your hosting account dashboard, usually under "Account Details" or a similar section.
Once you’ve got them, you just need to pop them into your domain registrar's settings:
- Log into the account where you bought the domain (e.g., Google Domains, Namecheap).
- Find the domain management or DNS settings area for your new domain.
- Look for the option to change or update nameservers and replace the default ones with the two (or more) provided by your host.
This simple change tells the entire internet's address book that anyone typing in your domain should be directed to your specific server. It's a fundamental step whether you’re starting a fresh site or tackling something more complex, like moving an existing one. If you're ever in that boat, our guide on how to migrate a website to a new host breaks down that process in detail.
This infographic shows how connecting to hosting is the foundational step that makes everything else—like setting up professional email and an SSL certificate—possible.
As you can see, getting your domain and hosting connected is the bedrock that the rest of your online presence is built upon.
The Waiting Game: Understanding DNS Propagation
Here’s one thing that trips up a lot of people: after you update your nameservers, the change isn't instant. It has to ripple across the internet in a process called DNS propagation. Think of it as a global memo being sent to Internet Service Providers (ISPs) everywhere, telling them to update their records with your new info.
This propagation can take anywhere from 30 minutes to 48 hours to complete, although it’s often done much faster these days.
During this time, you might find your new website works perfectly for you but not for a friend in another city. That's totally normal. There's no need to panic if your site doesn't pop up immediately. You can use a free tool like DNS Checker to watch the progress in real-time across the globe.
Once propagation is complete, your domain and host will be successfully connected, and you’ll be ready for the fun part: building your website.
4. Set Up Your Professional Email and Essential DNS Records
Nothing sinks that initial impression faster than seeing an email from mybusiness123@gmail.com. On the flip side, getting a message from contact@yourdomain.com instantly signals professionalism. It’s a small detail, but it tells potential customers you’re a legitimate business that has invested in its brand. This is a critical move to make right after you've bought your domain.

Most hosting providers make setting this up incredibly simple. Head into your hosting control panel (often cPanel), and you can usually create new email accounts in just a few clicks. So, if your domain is mykcbakery.com, you could spin up addresses like orders@mykcbakery.com or jane.dough@mykcbakery.com in minutes.
But here’s the thing: just creating the email address is only half the job. To make sure your messages actually land in someone's inbox—and not their spam folder—you need to configure a few special DNS records.
Demystifying Your Email DNS Records
Think of these records as your email's digital passport. They prove to other mail servers like Gmail and Outlook that your emails are authentic and haven't been forged by a spammer. Skip this part, and you'll run into major deliverability problems.
There are three records you absolutely need to get right:
-
MX (Mail Exchanger) Record: This is the most fundamental one. It tells the internet which mail server is in charge of receiving emails for your domain. Your email provider (whether it's Google Workspace or your web host) will give you the exact values you need to plug in.
-
SPF (Sender Policy Framework) Record: This is basically an approved sender list. It's a DNS record that lists all the servers authorized to send emails on behalf of your domain, preventing scammers from spoofing your address.
-
DKIM (DomainKeys Identified Mail) Record: This adds a unique digital signature to every email you send out. The recipient's email server then checks this signature against a public key stored in your DNS to verify the message is legit and wasn't tampered with along the way.
Getting these records right is non-negotiable for professional communication. An email that lands in the spam folder is an email that was never sent. Take the time to configure all three to protect your sender reputation from day one.
For instance, if you're using a service like Google Workspace, they provide you with specific MX, SPF, and DKIM values. You'll just copy and paste those into your domain registrar's DNS management area. It’s a one-time setup that pays off every time you hit "send."
Proper setup is also crucial for getting verified with tools like Google Search Console, which uses email to confirm site ownership. For more on that, check out this guide on how to set up Google Search Console. Getting these records configured correctly ensures all your communications—whether with customers or search engines—are received loud and clear.
Installing a CMS and Securing Your Website
With your domain and hosting all wired up, it’s time to build the actual engine that will run your website. For the vast majority of new sites, this means installing a Content Management System (CMS). Think of a CMS as the software that lets you create, manage, and publish all your content without having to write a single line of code.

In this arena, WordPress is the undisputed champion, powering an incredible 43% of all websites on the internet. Its massive popularity comes down to its flexibility, user-friendly interface, and a ridiculously large ecosystem of themes and plugins.
Choosing and Installing Your CMS
Thankfully, the days of complex, technical installations are long gone. Most modern web hosts provide a "one-click install" feature right inside your hosting dashboard, making the whole process a breeze.
Just look for an icon for WordPress or a tool called "Softaculous" in your cPanel. This handy feature automates the entire setup for you. During the install, you’ll be prompted to create an administrator account.
Crucial Security Tip: Whatever you do, never use "admin" as your username. It’s the very first thing hackers will try when attempting to breach a site. Pick something unique, and you've instantly made your website a much harder target.
Once the installation is complete, you'll have a blank canvas, ready for you to start building. The very next step is to lock it down and protect the visitors who will eventually start showing up.
Activating Your SSL Certificate
An SSL certificate is completely non-negotiable in today's world. It's the technology that encrypts the data flowing between your visitors' browsers and your server, giving you that little padlock icon and the "https" in your URL bar.
Without an SSL, browsers like Chrome will slap a big "Not Secure" warning on your site, which is one of the fastest ways to scare off potential customers.
Beyond building trust, SSL is also a confirmed Google ranking factor. A secure site is simply more likely to rank higher than an insecure competitor.
Most hosting plans now include a free SSL certificate, often from Let's Encrypt. Activating it is usually as simple as flipping a switch in your hosting control panel. For most small businesses and blogs, this free option is all you'll ever need.
However, some businesses might choose to invest in a paid certificate for a few specific reasons:
- Higher Warranty Levels: Paid SSLs often come with a warranty that protects you from financial loss in the rare case of a data breach caused by a certificate failure.
- Enhanced Trust Seals: They can offer more prominent trust seals or "site seals" to display on your website, which can boost confidence, especially for e-commerce stores.
- Extended Validation (EV): This is the highest level of SSL, displaying your company’s name directly in the browser bar and offering the strongest visual cue of trust.
For a deeper dive into the process and your options, you can explore our full guide on how to install an SSL certificate. Getting your CMS and SSL set up correctly are two of the most important things to do right after buying a domain, laying a secure and functional foundation for everything that comes next.
Laying the Groundwork for SEO Success
With your website live and secure, it’s time to make sure people can actually find it. A beautiful site is useless if it’s invisible to search engines. This is where you begin laying the essential groundwork for Search Engine Optimization (SEO)—the process of making your site more visible on platforms like Google.
Your first moves don't require a big budget or deep technical knowledge. Instead, they involve setting up free, powerful tools that give you direct insight into how Google sees your site and how users interact with it. Getting these fundamentals right from day one is what separates a thriving online presence from a digital ghost town.
Connecting to Google's Essential Tools
Before you worry about keywords or content, you need to establish a direct line of communication with Google. This is done through two indispensable—and completely free—platforms.
-
Google Analytics: This is your digital dashboard for understanding your audience. It answers critical questions like, "How many people are visiting my site?", "Where are they coming from?", and "Which pages are most popular?". Setting it up involves adding a small tracking code to your site, a process that most WordPress SEO plugins can simplify for you.
-
Google Search Console: If Analytics is about your visitors, Search Console is about your website's relationship with Google itself. It's the tool that alerts you to technical problems, shows you which search queries are bringing people to your site, and allows you to monitor your site's overall health in Google's index.
Think of it this way: Google Analytics tells you what happens on your site, while Google Search Console tells you what happens before someone gets there. You need both to get the full picture.
Setting up these tools is a non-negotiable first step. They provide the baseline data you'll use to measure success and make informed decisions as you grow.
Creating Your Website's Roadmap
After connecting your site to Google's tools, your next task is to hand Google a map of your website. This map is called an XML sitemap. It’s a file that lists every important page on your site, helping search engine crawlers discover and index your content more efficiently.
Without a sitemap, crawlers have to find your pages by following links, which can be slow and inefficient for a new site with few internal or external links. Submitting a sitemap directly through Google Search Console is like giving them a clear, organized directory to your content, ensuring nothing important gets missed. To dive deeper into this, our guide on how to create an XML sitemap offers a step-by-step walkthrough.
You’ll also want to create a robots.txt file. This is a simple text file that tells search engines which parts of your site they shouldn't crawl, like admin pages or thank-you pages. It helps guide crawlers to focus only on the valuable content you want indexed.
Installing a Foundational SEO Plugin
For WordPress users, the easiest way to manage many of these initial SEO tasks is with a dedicated plugin. Two of the most trusted names in the space are Rank Math and Yoast SEO. Installing one of these should be one of the very first things you do on a new WordPress site.
These plugins simplify complex tasks and provide a user-friendly interface for:
- Generating your XML sitemap automatically
- Editing your
robots.txtfile - Adding SEO titles and meta descriptions to your pages
- Verifying your site with Google Search Console
Once installed, run through the setup wizard. This will configure the basic settings and prompt you to connect your Google accounts, knocking out several foundational tasks in one go. This initial setup is the launchpad for all future SEO efforts.
Protecting and Managing Your Domain Long-Term
Buying your domain name isn't the finish line; it's the starting gun. From this point forward, your job is to protect and manage this crucial digital asset. A few simple, often-overlooked administrative tasks are your first and best defense against losing the brand you're about to build.
The most common disaster I see is also the most preventable: letting a domain expire because a credit card on file went out of date. It sounds simple, but it happens all the time and can be catastrophic for a business. The easiest fix in the world is to log into your registrar and enable auto-renewal. It's a single toggle that can save you from a world of future headaches and the sky-high fees for reclaiming an expired domain.
Shielding Your Personal Information
Here’s a fun fact most new domain owners learn the hard way: the moment you register a domain, your personal contact information—name, address, email, and phone number—gets published in a public database called WHOIS. It’s a requirement, and unfortunately, it makes you an immediate target for an army of spammers and telemarketers.
This is exactly why Domain Privacy Protection (sometimes called WHOIS protection) exists. For a small annual fee, your registrar will swap out your personal details with their own generic contact information.
Activating WHOIS protection is a small investment for a massive reduction in junk mail and unsolicited sales calls. It's one of the best "set it and forget it" security measures you can take.
Ensuring Stability with Backups and Monitoring
Beyond the administrative side, keeping your website healthy requires a bit of proactive care. Your online presence is worthless if it's not actually online. That’s why a consistent backup routine is non-negotiable.
Most quality hosting providers will offer automated daily or weekly backups. Do yourself a favor: double-check that this feature is active and make sure you know how to restore a backup if the worst happens. For an extra layer of security, I always recommend using a WordPress plugin like UpdraftPlus to send a separate copy of your site to a third-party cloud service like Google Drive or Dropbox.
Finally, you need to know the second your site goes down. Simple uptime monitoring is a lifesaver. Free tools like UptimeRobot can ping your website every few minutes and shoot you an instant alert if it's offline. This lets you jump on hosting issues right away, often before your visitors even notice there’s a problem. These long-term management habits are fundamental to protecting the value of the domain you just bought.
Frequently Asked Questions
Alright, you've got your domain. Now what? It's completely normal for a few questions to pop up as you figure out the next steps. Let's tackle some of the most common ones I hear from clients who just bought their first domain.
How Long After Buying a Domain Can I Use It?
You can start working with your new domain almost immediately. Right after your purchase is confirmed, you can jump in and set up things like a professional email address or connect it to a website builder.
The only real waiting game comes in when you're pointing the domain to a new web host by changing its nameservers. This kicks off a process called DNS propagation, which is basically the internet's global address book updating itself with your new info.
While it often only takes a few hours, this update can sometimes take up to 48 hours to fully complete worldwide. Don't be alarmed if your website access is a bit spotty during this window—it's a perfectly normal part of the process.
Do I Own the Domain Name Forever?
This is a great question because it's a common misconception. When you buy a domain, you're not actually buying it outright like a house. Instead, you're registering the exclusive right to use it for a set period, which is typically anywhere from one to ten years.
During that time, it's completely yours to control. To keep it that way, you just have to renew the registration before it expires. This is exactly why enabling the auto-renewal feature is one of the smartest things you can do—it protects your brand and prevents you from accidentally losing your domain to someone else.
The key takeaway is that your domain is more like a lease than a one-time purchase. As long as you keep up with renewals, it remains yours indefinitely.
Can I Use My Domain Without Building a Website?
Absolutely. A full-blown website is far from the only thing you can do with a new domain. Many smart business owners put their domain to work right away in other ways.
- Professional Email: Set up a custom email address like
contact@yourdomain.com. It immediately makes your brand look more credible than a generic Gmail account. - Redirecting: You can simply forward your domain to another online presence. Point it to your LinkedIn profile, an Etsy shop, or your company's Facebook page. It’s a great way to consolidate your brand.
- Parking: If you're not ready to build anything yet, you can just "park" the domain. This secures your brand name and keeps it safe until you're ready to launch a full site.
This flexibility means your new domain can be a valuable brand asset from day one, even before a single line of code is written.
Feeling overwhelmed by the next steps? The team at Website Services-Kansas City specializes in turning new domains into powerful, high-ranking websites. We handle the technical setup, from hosting and security to professional SEO, so you can focus on your business. Let us build your online presence the right way. Get started with Website Services-Kansas City today.