If you think a website migration is just about copying some files, I have some bad news for you. A successful move is 90% preparation and only 10% execution. It’s a strategic process that involves careful planning, picking the right partner, and setting a rock-solid timeline to make sure your most valuable digital asset moves without a hitch—and without torpedoing your SEO.
Crafting Your Pre-Migration Game Plan

Before you touch a single file or database entry, the most important work you'll do is laying the groundwork. A well-thought-out plan is your blueprint for the entire project. It's your defense against all the classic migration horror stories: extended downtime, lost data, and those frustrating post-launch bugs that drive users crazy and send your search rankings into a nosedive.
This isn't just about a simple checklist; it's a strategic approach to a complex technical job.
More businesses are getting the message. Recent data shows that nearly 40% of small to medium-sized businesses (SMEs) have moved their websites in the last five years, usually chasing better performance and security. The good news? Modern techniques are making things smoother, with about 42% of those migrations getting by with less than an hour of downtime. Planning is the secret sauce.
Conduct a Full Website Inventory
You can't move what you don't know you have. Seriously. The very first thing you need to do is a full-blown inventory of your entire website ecosystem. Think of it like packing up a house—you need to account for every single item to make sure nothing gets left behind or broken in transit.
Your inventory should document every last piece:
- All Databases: List every database your site relies on. Note its name, size, and what it does. Actionable Insight: For a WordPress site, this is typically one primary database. For a Magento store, you might have separate databases for products, customers, and orders.
- Plugins and Extensions: Get a complete list of all installed plugins, themes, and extensions. Make sure to note their version numbers and—this is crucial—confirm they're compatible with your new host's setup (especially the PHP version). Practical Example: If your old host runs PHP 7.4 and the new one uses PHP 8.1, an outdated plugin could crash your entire site. Check each plugin's compatibility page beforehand.
- Custom Code and Scripts: Do you have any custom PHP scripts, weird JavaScript modifications, or unique
.htaccessrules? Document them like your life depends on it. These are the things that always get forgotten and cause the biggest headaches later. - Media Files and Assets: Don't forget to account for your entire media library—every image, video, and downloadable file.
This pre-migration checklist is your roadmap to a clean, organized move. Before you even think about transferring files, ticking off these boxes will save you from common pitfalls and ensure a smooth transition.
| Task Category | Action Item | Why It Matters |
|---|---|---|
| Asset Audit | Create a full inventory of all files, databases, plugins, and custom code. | You can't migrate what you don't know exists. This prevents lost data or broken functionality post-move. |
| Hosting Due Diligence | Thoroughly research and select a new host based on performance, security, and support. | The right host is the foundation of your site's future. Don't base this decision on price alone. |
| Backup Strategy | Perform and verify a complete, restorable backup of your entire website. | This is your ultimate safety net. If anything goes wrong, a solid backup is the only thing that matters. |
| Timeline Planning | Map out a realistic timeline with clear milestones and buffer time for unexpected issues. | A rushed migration is a recipe for disaster. A schedule keeps everyone on track and prevents panic. |
Completing these tasks methodically turns a potentially chaotic process into a controlled, predictable project.
Choose Your New Host Wisely
Picking a new web host is a huge decision that will impact your site's performance, security, and ability to grow for years to come. Don't get suckered in by flashy marketing slogans promising "unlimited everything." You need to focus on real-world metrics and features that actually line up with what your business needs.
When you're comparing potential hosts, look way beyond the price tag. Your homework should focus on:
- Performance Benchmarks: Ask for hard data, like Time to First Byte (TTFB) and average server response times. Dig up independent reviews and performance tests. Actionable Insight: Look for hosts that offer NVMe SSD storage and a content delivery network (CDN) like Cloudflare integrated for free.
- Security Protocols: A good host offers way more than a free SSL certificate. Ask about their web application firewall (WAF), malware scanning, and DDoS protection.
- Technical Support: This is a big one. Test their support before you sign up. Are they available 24/7? Do they know what they're talking about, and are they quick to respond? A great support team is priceless during a migration.
Map Out a Realistic Timeline
Finally, it's time to build a detailed migration timeline with clear, achievable milestones. Trying to rush this process is asking for trouble. Your timeline absolutely must include buffer periods to handle any curveballs that get thrown your way—and trust me, there will be curveballs.
Practical Example of a Timeline:
- Week 1: Finalize host selection and conduct a full website inventory.
- Week 2: Perform initial full backup and start transferring files to the new host's staging environment.
- Week 3: Complete file transfer, import database, and begin internal testing on the staging site.
- Week 4 (Migration Day): Perform a final backup, update DNS TTL, execute the final sync, and switch DNS.
- Post-Migration: Conduct a full audit and monitor site health for at least one week.
While this is all about moving an existing site, many of the core principles are the same as starting from scratch. For more on that, you can check out our guide on how to launch a new website. A structured schedule keeps the whole project on track, prevents that last-minute panic, and ensures every step gets the attention it deserves.
Executing the Technical Website Transfer
Alright, you've got your plan. Now it’s time to get your hands dirty with the actual technical move. This is where precision and a little patience really pay off, turning what could be a stressful job into a controlled, step-by-step process. The core idea is simple: you’re moving an exact copy of your website from your old host to your new one, and the goal is to not lose a single piece of data along the way.
It’s easy to forget how risky this used to be. Not that long ago, migrating a website was a nightmare filled with data loss and long outages. A 2015 industry report found that over 60% of migrations led to unexpected downtime of more than four hours, with a shocking 20% losing data because of bad backups. Thankfully, things have gotten a lot better. By 2020, survey data showed that a solid 70% of migrations were being done with zero loss of user data. You can find out more about the evolution of these processes in this detailed analysis.
The Non-Negotiable Backup
Before you touch a single file, you have to create a complete and verified backup of your entire website. This isn’t a suggestion—it's the single most important step in this whole process. Your backup is your safety net. If anything goes sideways, a good backup lets you instantly restore your site on the old host and try again.
Don't just hit the "backup" button and call it a day. A real backup has two critical parts:
- Your Website Files: This is everything—your core CMS files (like WordPress or Joomla), themes, plugins, and all your uploaded media. Forgetting the media library is a classic mistake, and it can contain gigabytes of essential images and videos. If you need tips on prepping your images, check out our guide on how to optimize images for the web.
- Your Databases: Every single piece of content—from blog posts and user comments to product details and site settings—is stored in a database. You need a full export of every database your site uses.
Once you have those backup files, you have to verify them. Unzip the file archive to make sure it isn't corrupted. If you can, try restoring the backup on a local server or a staging site to be 100% sure it works perfectly.
Pro Tip: Never rely only on your old host's automated backups. Always take your own manual backup right before you start the migration. This gives you the most recent version of your site and puts you in full control of the files.
This flow chart visualizes the essential steps for the technical transfer, showing how everything starts with that verified backup.
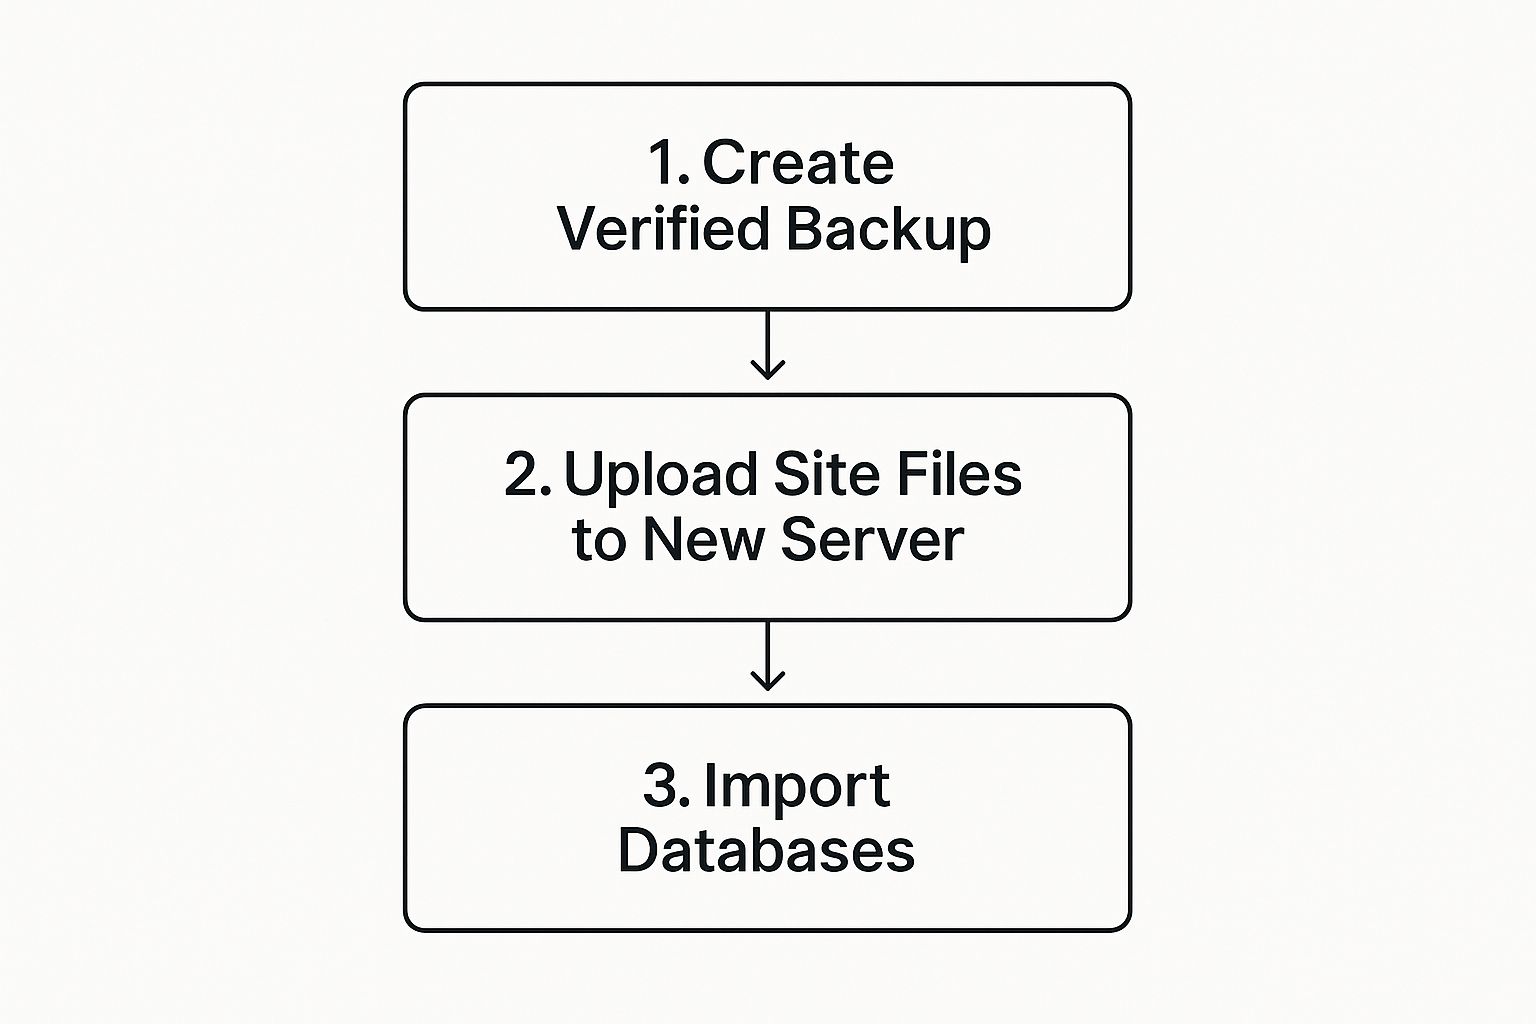
As the visual shows, each step builds on the last, which is why a solid backup is the foundation for the entire migration's success.
Moving Files to Your New Server
With your verified backup tucked away safely, the next step is to get your website files over to the new hosting environment. You’ve got a few different tools for this job, each with its own pros and cons.
- FTP/SFTP Client: Tools like FileZilla or Cyberduck are classic choices for a reason. They give you a simple visual interface to drag and drop files from your computer to the new server. For security, you should always use SFTP (Secure File Transfer Protocol) if your host offers it.
- cPanel File Manager: Most shared hosting providers have a web-based File Manager in their control panel (like cPanel or Plesk). This lets you upload a single compressed
.zipfile of your website and then extract it right on the server. Actionable Insight: This is often way faster than uploading thousands of individual files with FTP, as it's one large transfer instead of many small ones. - SSH (Secure Shell): If you're comfortable with the command line, SSH is the fastest and most powerful option. Using commands like
scporrsync, you can transfer files directly from your old server to the new one, skipping the step of downloading them to your own computer first.
No matter which method you pick, the goal is the same: upload your entire file structure into the public_html (or whatever your host calls it) directory on your new server.
Database Creation and Import
Your files are only half the story. Now they need a database to connect to. This means you’ll need to create a new, empty database on your new host and then import your backup data into it.
First, log in to your new host's control panel and find their database tool, usually called something like "MySQL Databases." You'll need to do three things:
- Create a new database. (e.g.,
newsite_wp123) - Create a new database user. (e.g.,
newsite_user) - Assign that user to the database and give them full privileges.
This part is crucial: write down the database name, username, and password you just created. You’ll need them in just a minute.
With the empty database ready to go, use a tool like phpMyAdmin (which you’ll also find in your host's cPanel) to import the .sql file you backed up earlier. This process will fill your new database with all of your old content.
Finally, you need to tell your website how to connect to this new database. Find your site's main configuration file—for WordPress, this is the wp-config.php file. Open it up and update the lines for DB_NAME, DB_USER, and DB_PASSWORD with the new credentials you just saved. Once you save that file, your website's files and its database are officially connected on their new server, ready for you to start testing.
Navigating the Critical DNS Switch
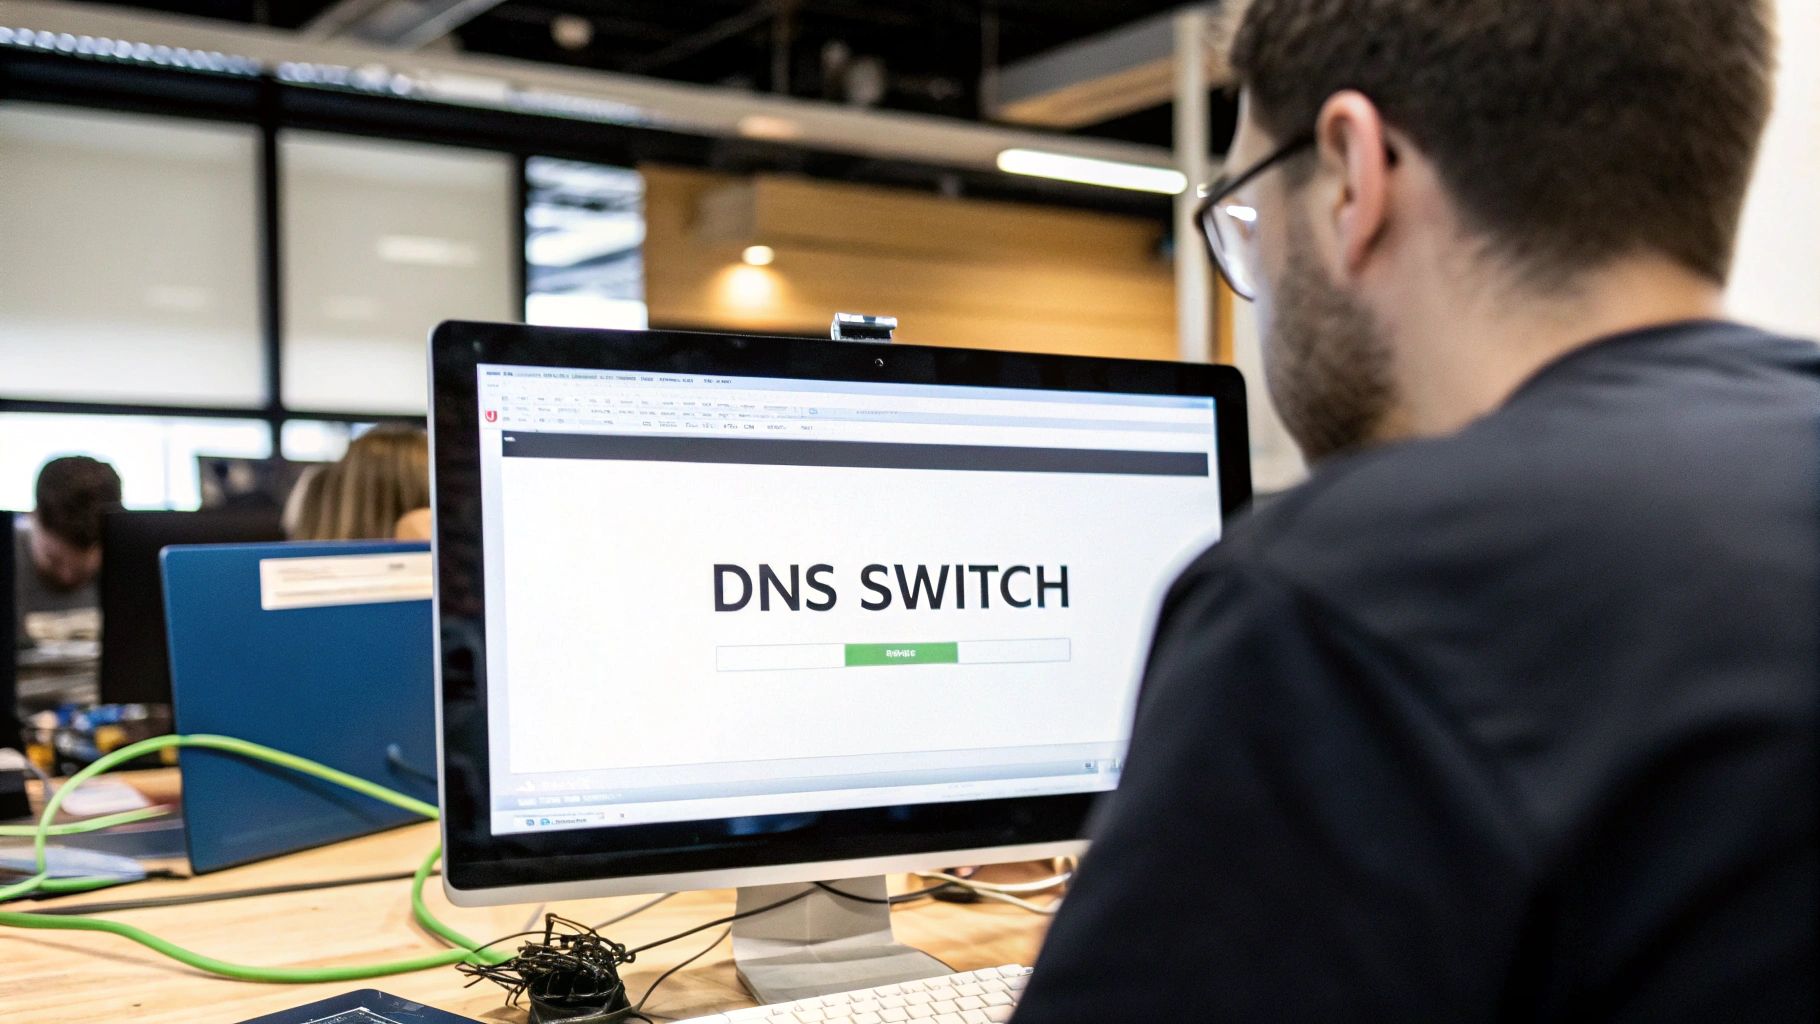
After all the planning, backups, and file transfers, you’ve arrived at the moment of truth in your website migration. This is where you tell the entire internet where to find your website’s new home. It sounds simple, but this is easily the most critical part of the process.
Think of the Domain Name System (DNS) as the internet's global address book. When someone types your domain into their browser, DNS servers look it up to find the server IP address where your website lives. The DNS switch is just updating that address book entry to point to your new host.
But this update isn't instant. It kicks off a process called DNS propagation, where servers all around the world gradually update their records with your new information. Patience is key here; the change can take anywhere from a few hours up to 48 hours to fully complete. During this window, some visitors might see the old site while others see the new one.
Updating Your Nameservers
First things first, you need to find the nameservers for your new host. They’re usually in your hosting account's welcome email or sitting right in your control panel. They almost always come in pairs and look something like this:
ns1.newhost.comns2.newhost.com
Once you've got those, log in to your domain registrar—that’s the company where you bought your domain name, like GoDaddy, Namecheap, or Google Domains. Find the DNS management section for your domain and look for the option to change or update your nameservers.
You'll swap out the old nameservers with the new ones you just copied. The moment you hit save, the propagation process officially begins. This is the point of no return.
Takeaway: The DNS switch is a waiting game. Don't panic if your site doesn't appear on the new host right away. You can use an online tool like DNSChecker.org to watch the propagation progress across different global locations.
The Pro Tip to Speed Things Up
While you can't force every server on earth to update instantly, there’s a powerful trick you can use to dramatically shorten the wait. It involves adjusting your domain's Time To Live (TTL) value before you even think about making the switch.
TTL is a setting that tells DNS servers how long they should cache (or remember) your domain's information before they check for an update. Most registrars set a default TTL of 24 or 48 hours. By lowering this value way ahead of time, you're telling servers to check for changes much more frequently.
Here’s the game plan:
- At least 24-48 hours before your migration, log in to your domain registrar.
- Navigate to your advanced DNS settings and find the TTL value for your main A record.
- Lower the TTL to the minimum value allowed—often 300 seconds (5 minutes) or even 60 seconds.
- Save the changes and let that old, long TTL expire.
By doing this in advance, you ensure that when you finally do switch the nameservers, DNS servers worldwide will pick up the change in minutes, not days. This simple, proactive step is a hallmark of a well-planned migration. It minimizes the time you're in limbo and reduces the risk of confusing your visitors or running into issues with your website is not showing up on Google search after the move.
Conducting Your Post-Migration Audit

The DNS has propagated, and your site is officially live on its new server. It's incredibly tempting to pop the champagne and call it a day, but the most meticulous work is just beginning. This final phase isn’t just a quick check; it's a comprehensive audit to find and fix the inevitable little problems before your visitors—or worse, Google—discover them.
Think of this as the final inspection before you hand over the keys. A seamless user experience is the entire point of learning how to migrate a website, and this audit ensures you actually deliver on that promise. Skipping this can lead to broken user journeys, lost sales, and a damaged reputation.
Your Essential Front-End Checklist
Start by looking at your website exactly as a visitor would. Your main goal here is to hunt for anything that looks out of place, feels clunky, or simply doesn't work. This is a manual, click-by-click process that requires serious attention to detail.
Your first sweep should focus on the most visible, high-impact elements:
- Broken Links and Images: Use a tool like Screaming Frog or an online link checker to crawl your site for 404 errors. Then, manually click through your main navigation, footers, and key landing pages to spot any broken links or images that failed to transfer.
- Interactive Elements: Test every single form on your site. This means contact forms, newsletter sign-ups, and login portals. Fill them out and confirm that the submissions are actually being received correctly. Actionable Insight: Set up a test email address to ensure notifications from forms are being delivered properly and not going to spam.
- E-commerce Functionality: If you run an online store, this part is non-negotiable. Go through the entire checkout process—add a product to the cart, apply a discount code, and complete a test transaction to ensure your payment gateways are firing correctly.
This process can feel tedious, I know. But finding a single broken checkout link could save you thousands in lost revenue.
Verifying Back-End and Technical Health
With the visual checks done, it's time to dig deeper into the technical foundation of your newly migrated site. This is where you confirm that everything under the hood is running smoothly and, most importantly, securely.
One of the first and most critical tasks is to reinstall your SSL certificate. Even if you had one on your old host, you need to issue a new one for the new server to ensure your site is served over HTTPS. Most modern hosts make this a simple one-click process, but it's a step that absolutely cannot be forgotten. A site without a valid SSL will trigger scary security warnings in browsers, instantly eroding visitor trust.
Crucial Takeaway: An SSL certificate is tied to the hosting server, not just the domain. Always plan to install a new certificate on your new host immediately after the migration is complete to avoid security warnings and protect your users' data.
After securing your site, shift your focus to performance and plugins.
- Plugin and Theme Functionality: Go through your list of plugins and extensions. Confirm they are all active and configured correctly. It's common for a migration to reset settings or cause conflicts with the new server environment.
- Email Delivery: If your website sends out transactional emails (like password resets or order confirmations), send test emails to confirm they are being delivered and not landing in spam folders.
- Performance Metrics: Run your site through Google PageSpeed Insights or GTmetrix. Compare the new performance scores to the baseline you took from your old host. You should see an improvement; if not, it’s time to investigate what's causing the slowdown.
Monitoring and Long-Term Health
Your audit doesn't end the day you go live. The first week after a migration is a critical monitoring period where you need to keep a close eye on your analytics tools to spot any unusual drops or spikes in activity. For an in-depth look at this, our article on how to track website traffic offers some valuable insights.
Set up alerts in Google Search Console. It will be your best friend in identifying any new crawl errors or 404s that pop up as Google re-indexes your site at its new location. Addressing these issues promptly is vital for maintaining your SEO health.
To help you decide on your approach, it's worth weighing the differences between a manual migration and using an automated tool. While plugins can be faster, a hands-on manual approach often gives you more control during this critical audit phase.
Migration Approach: Manual vs. Automated
When planning your migration, one of the first decisions is whether to handle it manually or rely on an automated plugin. Each path has its own set of pros and cons, and the right choice depends on your site's complexity and your technical comfort level.
| Factor | Manual Migration | Automated Tools |
|---|---|---|
| Control | Full control over every file and database entry, making troubleshooting specific issues easier. | Less granular control; the process is often a "black box," which can complicate debugging. |
| Complexity | Requires more technical knowledge (FTP, database management) and is more time-consuming. | Simpler and faster, ideal for standard CMS setups like WordPress with fewer customizations. |
| Cost | Generally free, aside from your own time and the cost of any third-party audit tools you use. | Often involves a premium plugin or service fee, but can save significant time. |
| Best For | Custom websites, large e-commerce stores, or migrations where precision is paramount. | Standard blogs, small business sites, and users looking for a quick and easy solution. |
Ultimately, a successful post-migration audit transforms what could be a risky technical task into a professional and seamless transition. It’s the final step that ensures your website continues to perform and grow in its new home.
Troubleshooting Common Migration Headaches
https://www.youtube.com/embed/cPLr3Mobkug
Even with the most meticulous plan, a website migration can throw a curveball your way. It happens. The key is not to panic, but to know exactly where to look when something goes wrong. Think of it like a puzzle—if you know where the common problems hide, you can get back on track in no time.
Most post-migration headaches are actually pretty predictable. They usually pop up in a handful of common areas, from database connection errors to broken images. Having a troubleshooting checklist ready is your best defense against prolonged downtime and a frustrating experience for your visitors.
Solving the Dreaded Database Error
One of the most alarming messages you can see is the infamous "Error Establishing a Database Connection." It looks terrifying, but it simply means your website's files can't talk to your database. Don't worry—the fix is usually simple.
This error almost always points to a typo in your site's configuration file (for WordPress users, this is your wp-config.php file). You just need to open that file and meticulously double-check three values:
- Database Name: Make sure it perfectly matches the new database name you set up on your new host.
- Database Username: Verify the username is correct and that it's been properly assigned to the new database.
- Database Password: A single misplaced character here is often the culprit. Carefully re-enter the password to be certain.
Nine times out of ten, correcting these credentials and saving the file resolves the error instantly.
Fixing Mixed Content Warnings
After you've moved to a new host and activated a fresh SSL certificate, you might run into "mixed content" warnings. This happens when a secure page (HTTPS) tries to load insecure resources (HTTP), like images, scripts, or stylesheets.
These warnings don't just look unprofessional; they also compromise your site's security. The issue usually lies with hardcoded URLs buried in your database that still point to the old http:// paths. The most effective fix is to use a search-and-replace plugin or a database script to update all internal links to use HTTPS, ensuring every single asset loads securely. Slow-loading resources can also bog down performance, which is why it's a great idea to learn how to improve website loading speed as part of your post-migration cleanup.
Untangling File Permission Problems
What if some of your pages or images just refuse to load, and you're getting a "403 Forbidden" error? The problem is almost certainly incorrect file permissions. During a file transfer, permissions can sometimes get reset, which stops the server from being able to access the files it needs.
Key Insight: Most web hosts recommend setting directory permissions to 755 and file permissions to 644. These settings strike the right balance of security and accessibility, allowing the server to read and execute files correctly without leaving them vulnerable.
You can easily adjust these settings with an FTP client or right from your host's cPanel File Manager.
Restoring Email Functionality
Finally, if your business email was tied to your old hosting account, you might find it's gone silent after the DNS switch. This happens because your MX records, which tell the internet where to send your email, were pointing to the old server.
To get your emails flowing again, you'll need to update your domain's MX records at your domain registrar. Just point them to your new email provider, whether that's your new host, Google Workspace, or another service. It's a quick update that will restore your professional communications in a flash.
Got Questions About Your Website Migration? We've Got Answers
Even with a rock-solid plan, moving a website can feel a bit like performing surgery. It's totally normal to have questions pop up, especially when you're worried about things like your search rankings and how long this whole process will take. Let's tackle some of the most common questions we hear from clients.
How Long Does a Website Migration Usually Take?
This is a classic "it depends" question. A small, simple blog might be moved over in a couple of hours. But if you're running a massive e-commerce store with a huge database of products and customer info, the technical transfer alone could take several hours.
The real wildcard, though, is something called DNS propagation. This is the time it takes for the entire internet to recognize that your website now lives at a new address. While the hands-on work might be done, it can take up to 48 hours for these changes to fully ripple across the globe. During this window, some of your visitors might see the old site while others see the new one.
Will Migrating to a New Host Hurt My SEO?
This is the question that keeps website owners up at night. The good news? If you do it right, a migration should not damage your SEO. In fact, moving to a faster, more secure host can actually give your rankings a nice long-term boost by improving things like your Core Web Vitals.
The trick is to treat the move like a delicate operation. A successful, SEO-friendly migration comes down to a few critical actions:
- Keep Downtime Minimal: Plan the move for your slowest traffic hours to affect the fewest number of people.
- Don't Touch the URLs: Your URL structure needs to stay identical. Changing it is a surefire way to break all your valuable backlinks.
- Hunt for Errors Immediately: The moment the new site is live, run a crawl to find and squash any broken links or 404 errors.
- Get Your SSL Certificate Working: Make sure your SSL is properly installed and active on the new server from the second you go live.
Google gets that websites move. A well-planned migration protects all the SEO equity you've built. The goal is to make the change so smooth that search engines and users barely notice anything happened.
What Is the Biggest Mistake to Avoid During Migration?
The single most catastrophic error you can make is failing to create—and more importantly, verify—a complete backup before you touch anything. I'm talking about a full copy of all your website files and a clean, separate export of your entire database.
This backup is your emergency eject button. If something gets corrupted during the transfer or an import fails, this verified backup lets you instantly roll back to the old host. Without it, you're looking at the very real risk of permanent data loss and a recovery process you wouldn't wish on your worst enemy.
When Is the Best Time to Migrate a Website?
Timing is absolutely everything. You want to perform the migration during your period of lowest traffic. This minimizes the disruption for your audience if there are any small hiccups or brief moments of downtime during the switch.
Dive into your analytics tools, like Google Analytics, to pinpoint these off-peak hours. For most businesses, this usually means late at night on a weekday or sometime over the weekend. Scheduling the move for these quiet times ensures the fewest people will even notice it's happening.
Ready to move your website without the headache? The team at Website Services-Kansas City specializes in seamless, SEO-friendly migrations. Let our experts handle the technical details so you can focus on your business. Learn more about our professional website services.
